Saturday, February 28, 2015

Cranberry Pistachio Biscotti - Grain & Gluten Free

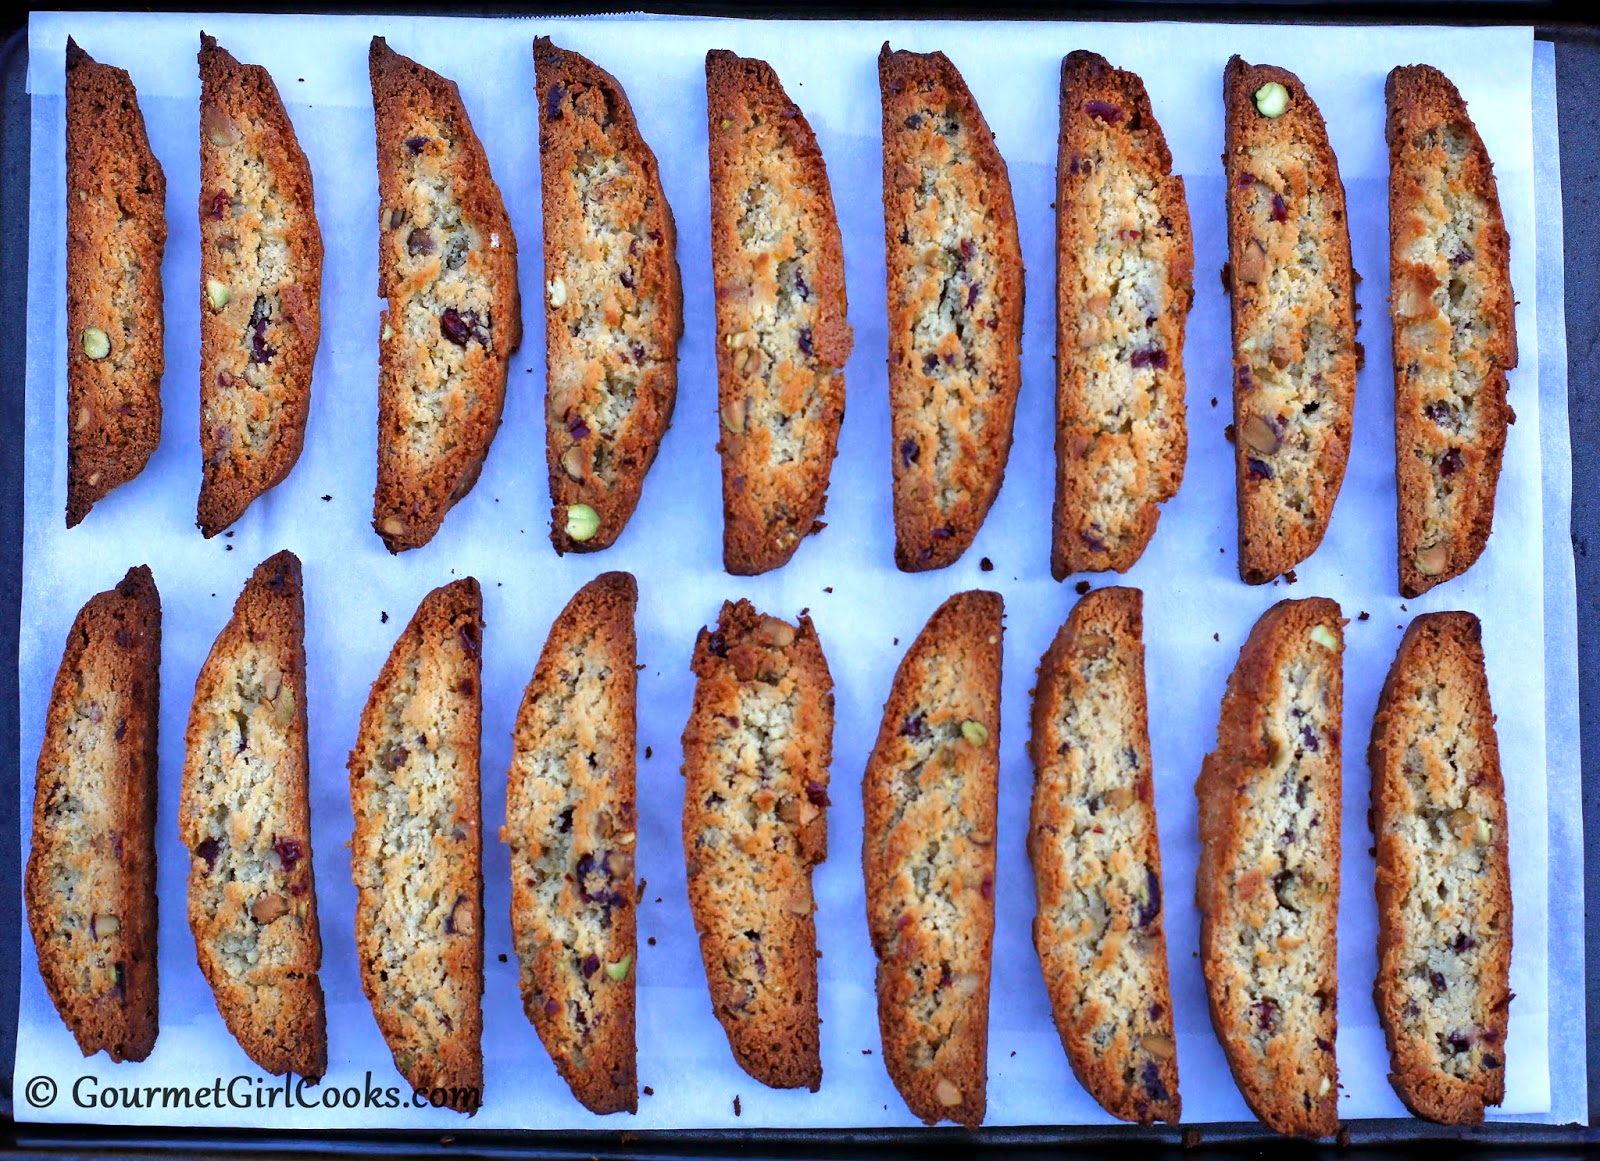
This afternoon it was cold and windy outside and a great day to stay inside and do a little baking, so we didn't get out and run our usual errands. Instead, I decided to make my favorite kind of biscotti; Cranberry Pistachio Biscotti. I used to enjoy eating DeLallo's Cranberry Pistachio Biscotti before I went grain free. My recipe makes 20 biscotti and uses only 1/4 cup of dried cranberries (Craisins). I opted not to use the reduced sugar version because it contained corn fiber (a grain). Instead, I kept the amount used in the recipe small and chopped them up finely to disperse them more evenly throughout the biscotti batter to make it seem like more, and it worked beautifully. I used roasted salted pistachios to contrast the sweet-tart flavor of the cranberries. There are recipes available out there to make your own no sugar added dried cranberries (I've actually roasted fresh berries in the oven before)...but for me, it wasn't worth the trouble for only 1/4 cup and that amount worked perfectly in this recipe without adding too much sugar (they contain about 1.7 grams of sugar each). I also added a touch of orange extract as well as fresh orange zest to give the essence of orange flavor without an overpowering orange flavor that I didn't want.

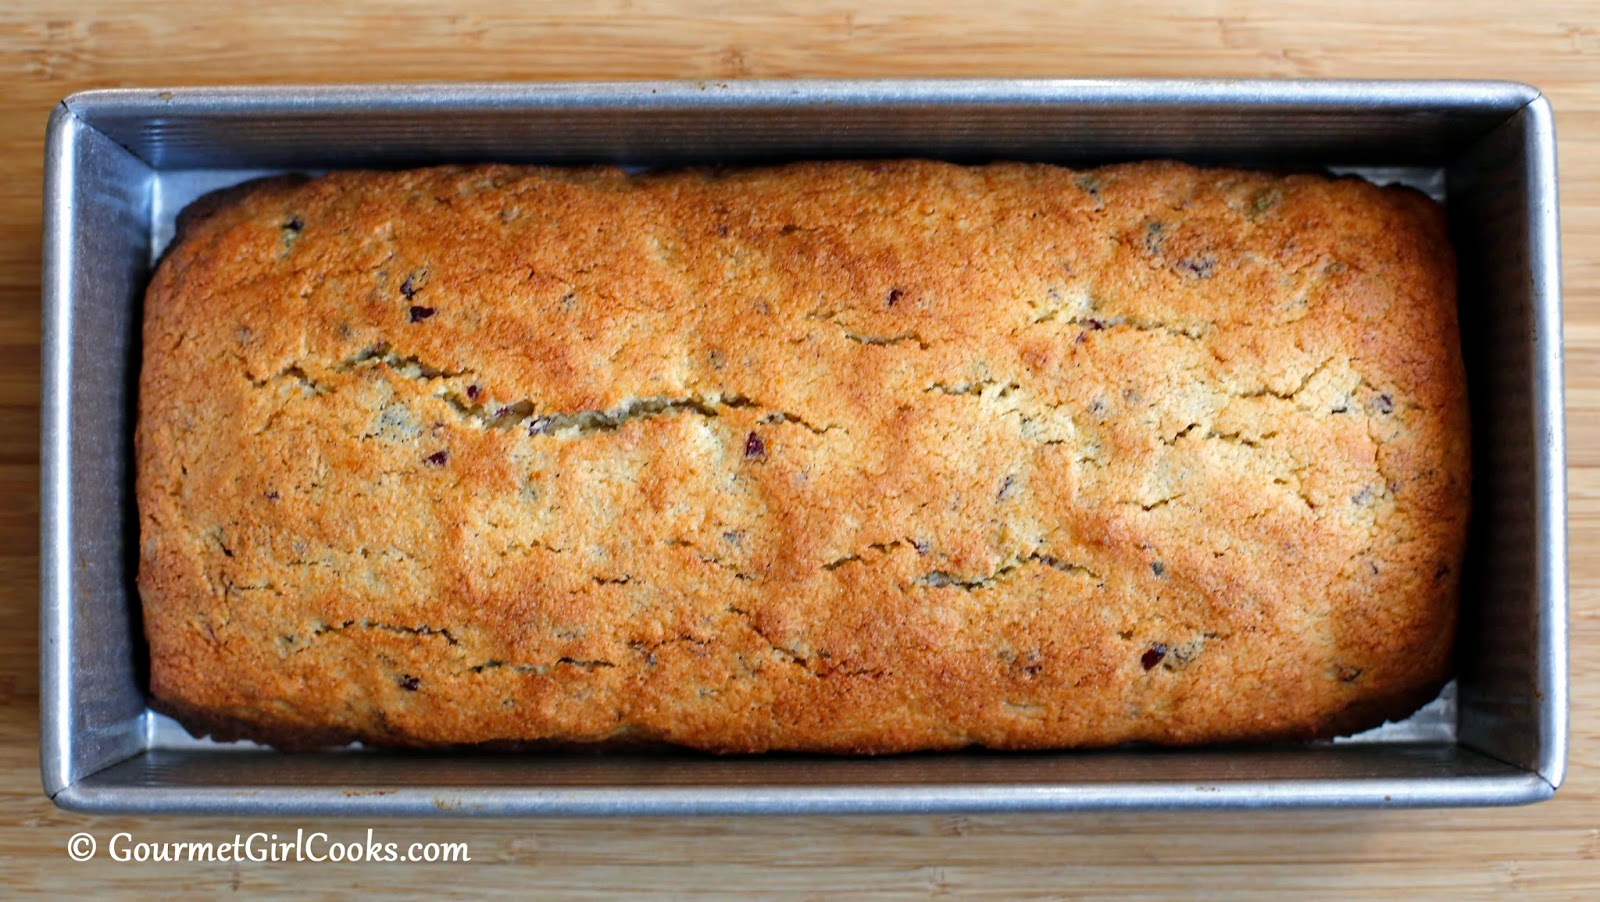
They turned out AMAZING and beautiful. This recipe is so easy to make. I used my USA Pan biscotti pan which helps make a nice uniform shaped loaf, but you can also make it on a parchment lined baking sheet as well and form the loaf by hand. It is easy to make and looks and tastes as good, if not better, as any commercially prepared biscotti I've had. I used 2/3 cup of Swerve but if you wanted them a little less sweet, you could reduce it by a couple of tablespoons and it would still be good and plenty sweet enough. If you haven't already seen my Chocolate Chip Biscotti yet, you can take a look at them here on Honeyville's site where I did a guest post: Chocolate Chip Biscotti. I snapped a few photos of my Cranberry Pistachio Biscotti below as well as the easy peasy recipe. Each serving contains approximately 3.3 grams net carbohydrates (total carbohydrates minus fiber) and 1.7 grams sugar. Enjoy!


Cranberry Pistachio Biscotti
Makes approximately 20

Ingredients:

5 tablespoons extra light olive oil (not regular olive oil)
2/3 cup Swerve granular sweetener
2 teaspoons vanilla extract
1/4 teaspoon orange extract
1 teaspoon finely grated orange zest
2 large eggs
1 tablespoon coconut flour
1 teaspoon baking powder
1/4 teaspoon salt
1/4 cup finely chopped dried cranberries
1/3 cup coarsely chopped roasted and salted pistachios

Directions:

Preheat oven to 350 degrees F.  Lightly grease a 12” x 5-1/2” biscotti pan or 13” x 18” baking sheet (or line with parchment paper).

In a medium bowl, cream olive oil and sweetener together. Add vanilla, orange extract, and orange zest; beat in the eggs.

In a separate bowl, combine almond flour, coconut flour, baking powder and salt and whisk to break up any lumps. Add dry mixture to wet mixture and stir until blended. Fold in cranberries and pistachios.

Scoop dough into the center of prepared biscotti pan. Using wet hands, shape dough into a log shape mounded slightly higher in the center. Leave approximately a 3/4” space around the edges of the pan to allow room to spread during baking. If using a baking sheet, place dough in center of prepared baking sheet and shape into a log approximately 10-1/2” long x 3” wide, mounding slightly higher in the center.

Bake for 30 to 35 minutes or until golden brown. Allow to cool in pan for 20 minutes, then carefully remove from pan and transfer to a wire rack. Cool for about one hour.

Reduce oven temperature to 300 degrees F. Using a sharp chef’s knife, slice biscotti crosswise into 3/4" slices (or cut diagonally, if preferred). Lay on sides on a parchment lined baking sheet. Bake 20 to 25 minutes, or until dry and golden; cool completely. Biscotti will continue to dry and crisp as it cools. Store in airtight container.

*Note: If biscotti begins to brown too quickly during the second baking, reduce oven temperature to 275 degrees F (instead of 300 degrees). 


Brussels Sprouts Hash w/ Wild Blueberries - Saturday's Amazing Low Carb Brunch

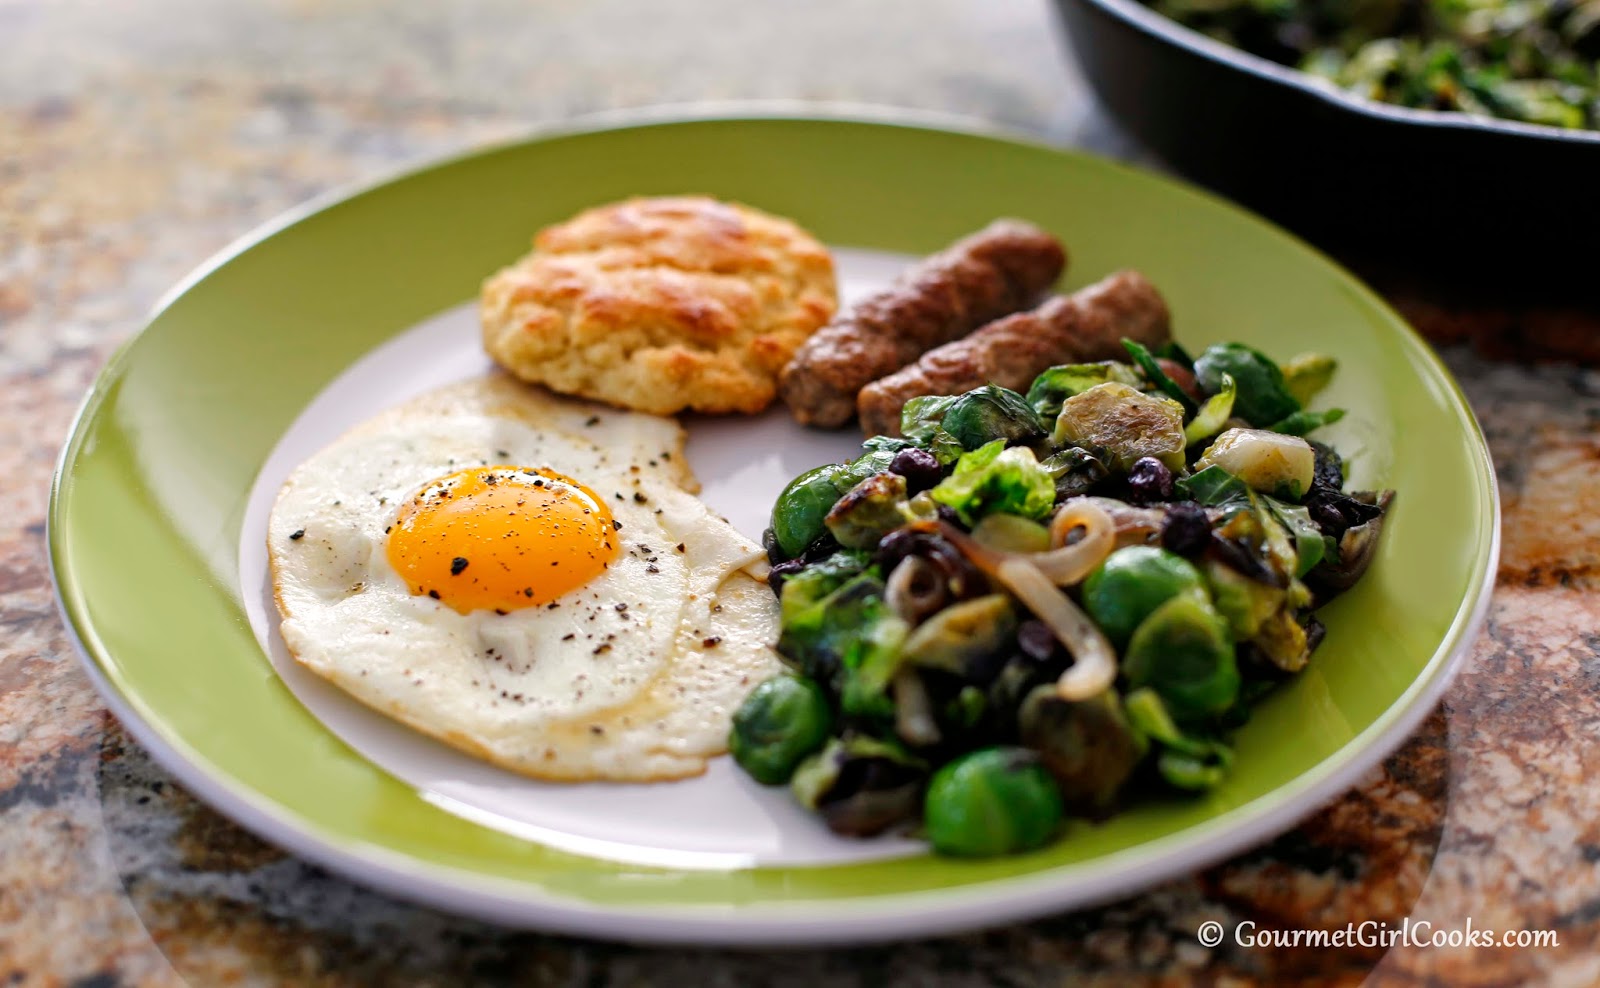
This morning I slept in late and woke up hungry and ready for a hearty breakfast. I actually fell asleep before 8:00 last night without any dinner! As I rambled around in my fridge, I pulled out the organic eggs, turkey sausage, leftover Buttermilk Biscuits and a bag of fresh brussels sprouts!

I decided to make a quick and easy "hash" using thinly sliced brussels sprouts and thinly sliced onions cooked in a bit of coconut oil in my cast iron skillet. As I was sauteing the onions and sprouts, I decided to take a walk on the wild side...wild blueberries, that is! LOL I've added cranberries to brussels sprouts before and liked it, but wondered how some of the frozen wild blueberries I had in the freezer might go in my "hash"...so I tossed some in. It was AMAZING! It added a very subtle hint of sweetness without making it sweet and the essence of wild blueberries just went extremely well with the sweetness of caramelized onions and sprouts. I seasoned my hash generously with sea salt and freshly ground black pepper. It was literally a match made in heaven! I made fried eggs and turkey sausage to go with my hash for breakfast and reheated a leftover Buttermilk Biscuit. Voila...I had an amazing brunch. I snapped a few photos below as well as included my easy peasy recipe for Brussels Sprouts Hash w/ Wild Blueberries. Enjoy!


Brussels Sprouts Hash w/ Wild Blueberries

Ingredients:

1 tablespoon coconut oil
1 small onion sliced
1 pound of trimmed fresh brussels sprouts, sliced in 1/4-inch thick slices
1/4 cup frozen wild blueberries (or substitute small fresh blueberries)
Salt and pepper, to taste

Directions:

Heat coconut oil in a heavy skillet over medium-high heat. Add onions to pan and saute until softened and beginning to turn golden, stirring frequently, for about 5 minutes. Add brussels sprouts and continue cooking until they begin to soften and caramelize a bit, stirring frequently, about 5 to 10 minutes or until desired doneness (I prefer mine al dente with a little texture and chew remaining). 

Add frozen blueberries, stir and cook 1 to 2 minutes or until blueberries are heated through. Season to taste with salt and pepper.


Thursday, February 26, 2015

Chocolate Chip-Blueberry Skillet Pancake - New Recipe!

Today I'm debuting my new Chocolate Chip-Blueberry Skillet Pancake recipe via my guest post on Honeyville's blog. While many of you have already been enjoying my recipe for No-Flip Berry Pancakes, this recipe is different. A number of you have let me know that you either do not care for flax (which is used in my no-flip pancake) or that you simply choose not to eat it...so you will be excited to know that this recipe does not include any flax. It uses my favorite Honeyville blanched almond flour, ground chia seeds and a touch of coconut flour, It's a great recipe that can easily be customized by adding your own personal add-ins.

I really love this skillet pancake. Texture wise it's a cross between a pancake and a coffee cake. I can attest that I have enjoyed it in a variety of ways; topped with sugar free syrup, topped with a big dollop of whipped cream, and last night I actually enjoyed it for dessert warmed with a scoop of sugar free vanilla bean non-dairy coconut "ice cream." Each time I eat it a different way, I say that THAT is my favorite way to enjoy it. I don't add a lot of sweetener to this recipe, only 1/4 cup because it gets additional sweetness from the blueberries and bittersweet chocolate chips. If you'd like it sweeter and more like a coffee cake, simply increase the sweetener a bit (up to 1/2 cup). I love, love...LOVE this skillet pancake. It's so versatile because it makes either a great breakfast treat or yummy dessert. I won't lie, I've even enjoyed it as my lunch topped with a couple of sliced strawberries and whipped cream. Check out a few of my photos below as well as the link to the recipe.

To get to the recipe, click here: Chocolate Chip-Blueberry Skillet Pancake. Enjoy!


Monday, February 23, 2015

Chopped Beef Biscuit Sandwiches w/ Pepper Jack Gravy

This evening I used the leftover Boneless Beef Short Ribs to make Chopped Beef Biscuit Sandwiches w/ Pepper Jack Gravy. It was so simple to make because I also had leftover Southern Style Buttermilk Biscuits, too. I simply chopped the remaining beef and put in a saucepan with a little over 1 cup of the leftover "au jus" from the boneless ribs that I had cooked in the crock pot a few days ago. I simmered it and cooked it down for about 10 minutes while I diced about 3 ounces of pepper jack cheese. I removed the beef with a slotted spoon and placed it in a bowl and then whisked the pepper jack cheese into the pan juices until it melted and thickened slightly. I added the beef back and heated everything through and sliced the biscuits in half and served them piled high with the chopped beef and pepper jack gravy. It was delicious and hubby really loved them. I snapped a few photos below. Enjoy!


Sunday, February 22, 2015

Creamy Shrimp & Chicken Marinara - Easy Low Carb

This evening both of my sons came for dinner. I made easy Creamy Shrimp & Chicken Marinara. This morning I took a pound of large raw wild shrimp out of the freezer that I picked up at Costco yesterday and placed them in a bowl in the fridge to thaw out a bit. I simply diced up 1 pound of boneless chicken breasts and sauteed them in a little olive oil in my nonstick wok until they were opaque (I used the wok because there is less splatter on my stove since it's deeper than a skillet). I added a heaping cup of quartered fresh mushrooms to the pan and sauteed a bit longer until they released their juices. I drained the liquid and juices from the chicken and mushrooms and then added the partially thawed shrimp and sauteed for about 5 minutes until they began to cook and release their juices and then drained it again so my sauce wouldn't be watery. I added a generous pinch of red pepper flakes and then poured in a jar of DelGrosso's Fireworks Sauce and simmered it uncovered for about 10 minutes. I stirred in about 1/4 cup of heavy cream to balance the heat of the spicy sauce and simmered an additional 5 minutes and then set aside.

While the sauce was simmering, I used my Paderno Spiralizer to make a big pile of zoodles (zucchini noodles). You can make a bunch of zoodles in just a couple of minutes. I salted them and wrapped in paper towels to absorb the extra moisture they release and set it aside for 15 to 20 minutes. I lightly sauteed them in a bit of olive oil and seasoned with a pinch of sea salt. I served the zoodles in big pasta bowls topped with the rich and thick Creamy Shrimp & Chicken Marinara and then topped with shredded Parmigiano Reggiano. It was delicious and the addition of cream balanced the spiciness of the sauce which went excellent with the shrimp and chicken. If you've never made zoodles, click on the link to see my little tutorial on how to make non-watery zoodles using a Paderno Spiralizer: How to Make Non-Watery Zoodles. I snapped a few photos of our meal below. Enjoy!


I used half of this bag and sealed the other half back up and popped it back in the freezer


Hot Chocolate Milkshake - Dairy Free Deliciousness

It's a cold, dark and damp rainy day here today. I typically don't eat lunch on weekends since we sleep in a bit and have a more substantial late breakfast/brunch than we do during the week. However, this afternoon I was in the mood for something rich, warm and chocolatey. A little over a month ago, before I got sick, I picked up a carton of Silk's new unsweetened cashew milk and thought it might be nice to make hot chocolate with. It has 25 calories per cup, 1 gram of carbs and no sugar. Well, it had gotten pushed to the back of my fridge and I really hadn't thought much about it since. This morning I noticed it had a "use by date" of 3/9/15...so I decided this afternoon would be a good time to give it a whirl.

I started out with the idea of making hot chocolate and decided I didn't want to fool around with incorporating dry cocoa powder into the cashew milk. While it's possible to do, it can be such a pain getting dry cocoa powder blended smoothly into liquid and I was looking for rich, thick, creamy smooth decadence in a mug! LOL So, I decided to chop some of my organic Endangered Species 88% cacao dark chocolate bar up and melt and whisk it into the hot cashew milk I had heated up. Well, it could have been so simple but I couldn't help but make it SUPER special! I made 2 servings...one for me and one for hubby, so I used 2 cups of the cashew milk and heated it up on the stove until it just began to simmer and then cut the heat and then whisked in confectioners style Swerve, a little vanilla extract, a pinch of pink Himalayan sea salt and then the chopped dark chocolate. I whisked vigorously to get it a little frothy...and then the little switch went off in my head. I wanted it to be RICH...THICK...CREAMY and chocolatey. I remembered how nicely cashew butter thickened my stir-fry sauces (instead of the cornstarch I used to use). I was already using cashew milk...so, why not give it a try. I stirred in some cashew butter and whisked until it began thickening...and then the next little switch went off in my head...why not pull out my little stick blender and make it super thick and FROTHY! I whizzed away and before my eyes, my simple little pot of hot chocolate morphed into a decadent hot chocolate MILKSHAKE!!! It was amazing...it was filling...it was decadent...and it provided us with the "got milk" mustache...only ours was CHOCOLATE!  Make it...shake it...you don't have to bake it. Recipe and photos below. Enjoy!


I used the Silk cashew milk (found in the dairy case), but also keep the shelf stable So Delicious version in my pantry
1-1/2 ounces of 88% cacao adds 5.5 grams net carbs and 2.5 grams sugar per serving

Each cup of the unsweetened cashew milk adds 1 gram of carbs and 0 grams of sugar per serving

Hot Chocolate Milkshake - Dairy Free

Ingredients:

2 cups unsweetened cashew milk
4 to 6 tablespoons confectioners style Swerve (or preferred sweetener)
1/4 teaspoon vanilla extract
Pinch of sea salt
1-1/2 ounces bittersweet chocolate, chopped (I used 88% cacao)
1 to 2 tablespoons cashew butter

Directions:

Heat cashew milk in a saucepan over medium high heat until hot. Remove from heat. Whisk in sweetener, vanilla and salt. Add chocolate and whisk until melted and blended in. Add cashew butter and stir until melted in and thickened. If desired, blend with a stick blender until frothy and thick. Serve piping hot in mugs.

*Note: If necessary, add additional cashew milk to thin to desired consistency.


Friday, February 20, 2015

Boneless Beef Short Ribs - Slow Cooker Style

This evening we had Slow Cooker Boneless Beef Short Ribs for dinner. I made Roasted Cheddar Cauliflower as a side dish and served my Southern Style Buttermilk Biscuits with the meal. It turned out delicious. I put the short ribs in my crock pot this morning before work and the biscuits were already made so the only thing I had to put together after work was the cauliflower dish. It was extremely easy. I cut up a large head of fresh cauliflower into florets and tossed them with a few tablespoons of olive oil and seasoned with salt and pepper, then spread on a baking sheet and roasted in a 400 degree oven for about 45 minutes, stirring several times. Once it was done and toasty brown, I transferred it to a shallow baking dish and scattered about 1/2 cup of shredded cheddar cheese on top and ran it under the broiler for a few minutes to melt. Unfortunately, hubby couldn't eat the cauliflower because he's been down with a 24-hr tummy bug that's been going around. He did eat the beef and biscuits though. It was a simple and delicious meal and perfect for this frigid weather we've had here recently. There were snow flurries as I drove home from work so this meal was great to come home to. I snapped a few photos of our meal below. The recipe for my slow cooked beef short ribs can be found by clicking this link: Slow Cooker Boneless Beef Short Ribs. Enjoy!


Thursday, February 19, 2015

Cranberry-Pecan Chicken Salad Biscuit Sandwiches - Low Carb

This evening I wasn't particularly hungry. I had a pot of cooked chicken breasts that I prepared yesterday for our dog Spike. I cook plain boneless chicken breasts and freeze them every week to pull out and chop up to add to his food every day. 

Since I already had a big pot of cooked chicken breasts that I hadn't put away yet, I pulled out a large chicken breast to chop up and make chicken salad biscuit sandwiches with for dinner. I also had a bowl of fresh cranberry sauce in the fridge and a tray of buttermilk biscuits that I made last night. I popped a handful of pecans in the oven for about 10 minutes to roast at 325 degrees F while I diced up the chicken, chopped the celery and green onions and then mixed it all together with a little mayonnaise and cranberry sauce. I seasoned it with a pinch of sea salt and a few shakes of chipotle and roasted garlic seasoning and then stirred in the chopped toasted pecans. 

I split one of the biscuits in half and then piled it high with a big scoop of chicken salad...and "Voila"...I had a quick, delicious and easy dinner. I love adding cranberry sauce and roasted pecans to chicken salad. I snapped a few photos below. Also, I experimented a bit with my Southern Style Buttermilk Biscuit recipe when I made them last night to see if I could keep them "biscuity" but also make them a little more sturdy to hold up better for sandwiches. I think my little tweak made them better for slicing and making sandwiches with. I'm going to post my regular buttermilk biscuit recipe below with my little tweaks added. If you try my tweaked version, let me know what you think. Enjoy!  


Southern Style Buttermilk Biscuits #3
(Sturdier Sandwich Version)

Ingredients:


3 cups blanched almond flour

3 teaspoons baking powder
1/2 teaspoon baking soda (increased from original recipe)
1/2 - 3/4 teaspoon Kosher or Celtic sea salt
3 tablespoons chilled butter, small diced
3 ounces very cold brick style cream cheese, diced
2 large eggs, beaten (increased from original recipe)
1/4 to 1/2 cup cold buttermilk (*see note below; modified from original recipe)

Directions:

Preheat oven to 350 degrees F.  Line a large baking sheet with parchment paper or lightly greased non-stick foil.


In a medium mixing bowl, add flour, baking powder, soda and salt; whisk to mix well.  Add diced chilled butter and cream cheese.  Using a pastry/dough blender, quickly cut butter and cream cheese into dry ingredients until it appears crumbly and moistened.  

Crack both eggs into glass measuring cup; fill with buttermilk to the 3/4 cup mark. Make a well in the center of the flour mixture; add buttermilk and egg mixture and mix until it pulls together into a soft sticky dough. The dough will be light, airy and fluffy.  

Scoop dough onto prepared baking sheet using a 3-tablespoon size retractable scoop, spacing evenly apart to make approximately 15 equal sized mounds. Lightly tamp down tops to barely flatten top only (do not flatten biscuit). Bake for 20 to 22 minutes or until light golden brown. Cool approximately 5 to 10 minutes for easier slicing. Makes approximately 15 biscuits.

*Note: Total liquid mixture should equal 3/4 cup. Eggs vary in size and volume, so add them to the glass measuring cup first and then fill with buttermilk to the 3/4 cup mark (buttermilk used will be between 1/4 cup to 1/2 cup, depending on the volume of eggs used).   


Wednesday, February 18, 2015

Easy Chicken Satay Saute - Simple Low Carb Meal

This evening I wanted to make something using the boneless chicken breasts I had in the fridge. I whisked together a dusting/coating using peanut flour and a few other spices and seasonings. I lightly dusted the chicken with the mixture and browned and cooked it in a bit of coconut oil. It was peanutty, spicy, salty with a hint of sweetness. It was simple and good and reminded me of chicken satay, only this version had the flavors on the chicken instead of in the dipping sauce traditionally served with satay. My version was Chicken Satay Saute (how's that for a mouthful). You can make it more or less spicy or sweet, depending on your personal preference. I also made a batch of my Southern Style Buttermilk Biscuits to go with our meal. We enjoyed the chicken and biscuits with a side of "Superfood Salad" topped with my Cranberry Chipotle Vinaigrette. It was a simple and delicious meal for this cold and blustery night. I snapped a few photos below as well as included my easy peasy recipe. Enjoy!


Ready to pop in the oven


Chicken Satay Saute

Ingredients:

1 pound boneless skinless chicken breasts (or cutlets)
1-2 tablespoons coconut oil
1/3 cup peanut flour (I use Protein Plus Peanut Flour)
1/4 teaspoon onion powder
Dash garlic powder
1/2 teaspoon salt, or to taste
1/4 teaspoon cayenne pepper
1 tablespoon granular Swerve Sweetener, (or preferred granular sweetener)

Directions:
  • In a shallow bowl, combine peanut flour, onion powder, garlic powder, salt, cayenne and sweetener.
  • Coat chicken with flour mixture, pressing firmly to dust evenly with the coating.
  • Heat coconut oil in large skillet or wok over medium-high heat.
  • Cook chicken 5 to 7 minutes per side or until golden brown on both sides and done.
  • Season with additional salt and pepper, to taste and serve.


Tuesday, February 17, 2015

Crustless Zucchini, Tomato & Onion Pie

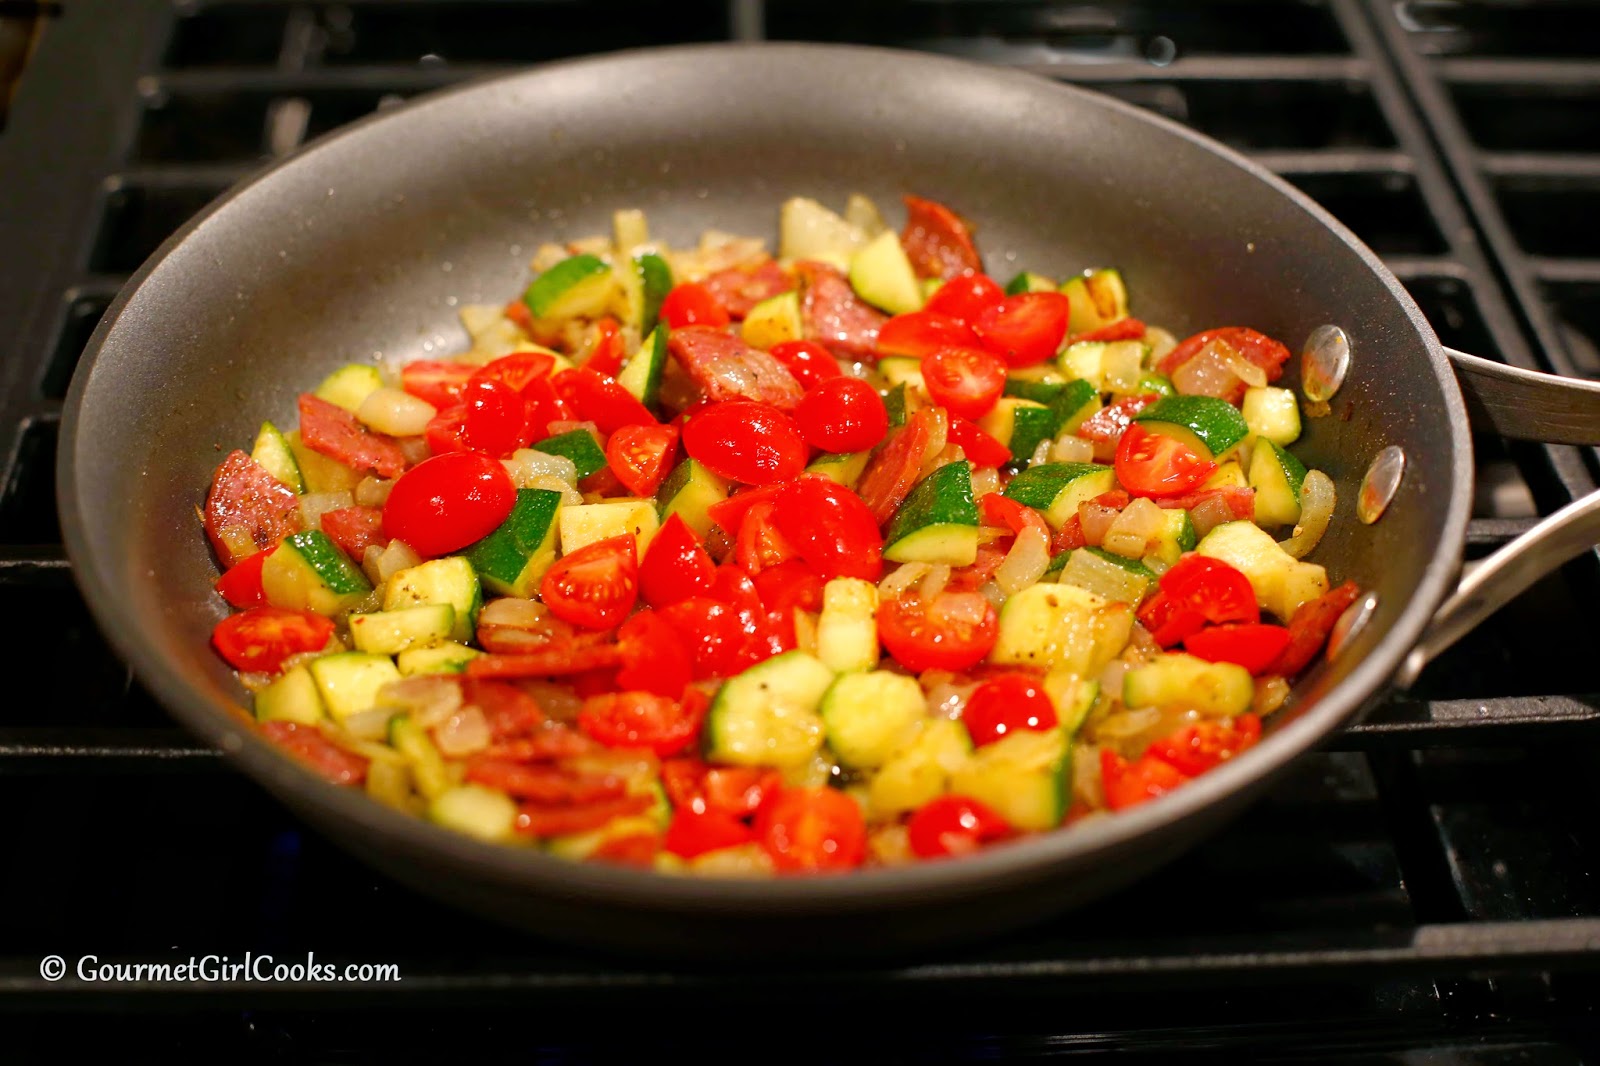
This morning we awoke to everything coated with ice and many governmental offices and schools were closed. Fortunately we didn't lose power like quite a few folks did. This evening I made a simple and easy meal for dinner and one that would also provide me with lunch for the rest of the week, too. I made Crustless Zucchini, Tomato & Onion Pie. I added some diced sauteed uncured salami to it for flavor. Pepperoni or bacon would also be good. I made it like one of the old Bisquick "impossible style pies" that I used to enjoy by adding some almond flour to my egg and cream mixture. I sauteed diced zucchini, onion, salami and added freshly diced sweet grape tomatoes. I seasoned it with a bit of Italian seasoning, salt and pepper. When it baked, it took on a "bready-style" texture rather than an "eggy-style" texture. Hubby and I really enjoyed it and now I have this week's lunch made, too. I snapped a few photos below as well as the easy peasy recipe. Enjoy!


Just for the record...I am SO over this!  Round #2

Crustless Zucchini, Tomato & Onion Pie

Ingredients:


2 tablespoons olive oil
1/2 cup onion, chopped
1 diced medium to large zucchini
1/4 cup diced uncured salami or pepperoni (or bacon)
1/2 cup diced fresh tomatoes (I used grape tomatoes)
7 large eggs
1/2 cup cream
1/2 cup blanched almond flour
1 cup shredded sharp white cheddar cheese (or other strong cheese)
1/4 teaspoon dried Italian seasoning
Salt and pepper, to taste

Directions:

Preheat oven to 375 degrees F. Lightly grease or spray a 10" deep dish pie plate

In a non-stick skillet, saute onions in olive oil over medium heat until beginning to soften, about 5 minutes; add zucchini and cook an additional 5 minutes. Add diced salami or pepperoni and saute an additional 5 minutes or until zucchini is almost tender; stir in tomatoes and cook an additional 2 minutes. Transfer to prepared pie dish or plate and spread evenly on bottom of dish.

In a medium bowl, beat eggs and cream; add almond flour and whisk until evenly blended. Stir in cheese and Italian seasoning and season with salt and pepper, to taste. Pour mixture over top of vegetable mixture in pie dish and bake for 35-40 minutes or until filling is puffed and golden and eggs are set (if the center is still slightly jiggly, cook for an additional few minutes). Let cool for 5 to 10 minutes; cut into wedges and serve. Makes about 6 servings.


Sunday, February 15, 2015

Real Low Carb Chinese Take-Out - My Way!

This evening, hubby actually went to our local Chinese restaurant to pick up "take-out" for us for dinner. The folks that own and run this restaurant know us from all the many years we were regular customers. Hubby occasionally still picks something up there but I haven't eaten from there in almost 3 years now since going low carb and grain free.

Since I haven't been feeling well, hubby didn't want me to cook this evening so we called them up at the restaurant and asked if they would be able to make me food that was steamed without any sauce or seasoning...just meat and veggies. They said yes that they would make me whatever I wanted. So, both last night and tonight, hubby picked up dinner for both of us from our local Chinese restaurant. I had planned to make Chicken Parmesan for dinner last night for Valentine's Day but hubby insisted I not cook last night either, and I am SO happy that I didn't! 

The food that our local Chinese restaurant made was so good. Last night I had Chicken w/ Broccoli (steamed) which contained chicken breast, fresh broccoli and a few sliced carrots (topped with peanuts). This evening I asked for Chicken & Shrimp w/ Mixed Veggies (steamed) and it contained chicken breast, shrimp, broccoli, snow peas, mushrooms, celery, carrot, and a few bamboo shoots and water chestnuts (topped with peanuts). No seasoning or oil whatsoever. I simply added my own Tamari sauce and a pinch of red pepper flakes and enjoyed taking a break from cooking while I'm recovering. I am so happy to have yet another low carb alternative for eating out (or eating in) when the need arises. I snapped a couple photos of my take-out food below. Enjoy!  (P.S. - thankfully the antibiotics are beginning to kick in and I'm starting to feel a little better this evening and hoping I will continue getting better each day).

Tonight's Chicken & Shrimp w/ Mixed Veggies (topped w/ peanuts)
Last night's Chicken w/ Broccoli (topped w/ peanuts)